• Home
  • Recipes
  • About
  • Contact
  • PRESS
Menu

The dessert project

Street Address
City, State, Zip
Phone Number
Playing with sugar

Your Custom Text Here

The dessert project

  • Home
  • Recipes
  • About
  • Contact
  • PRESS

butterscotch cake with chocolate glaze

May 9, 2021 Gayatri S

What are the 'makings of good baker' ? Is that a thing? I know the rules. Be organised. Mis en place. Clean workspace. read the full recipe in advance.  I am not good at doing any of these. I'm impatient and I'm not always well organized.  I bake with whatever ingredients are lying around and I add things along the way that were never a part of the recipe. Of course it doesn’t always come out well. But that’s when the creativity kicks in. How do you repurpose a fallen cake ? What can you do with burnt caramel? I try my best not to waste ANYTHING and improvise, turning disaster into dessert.

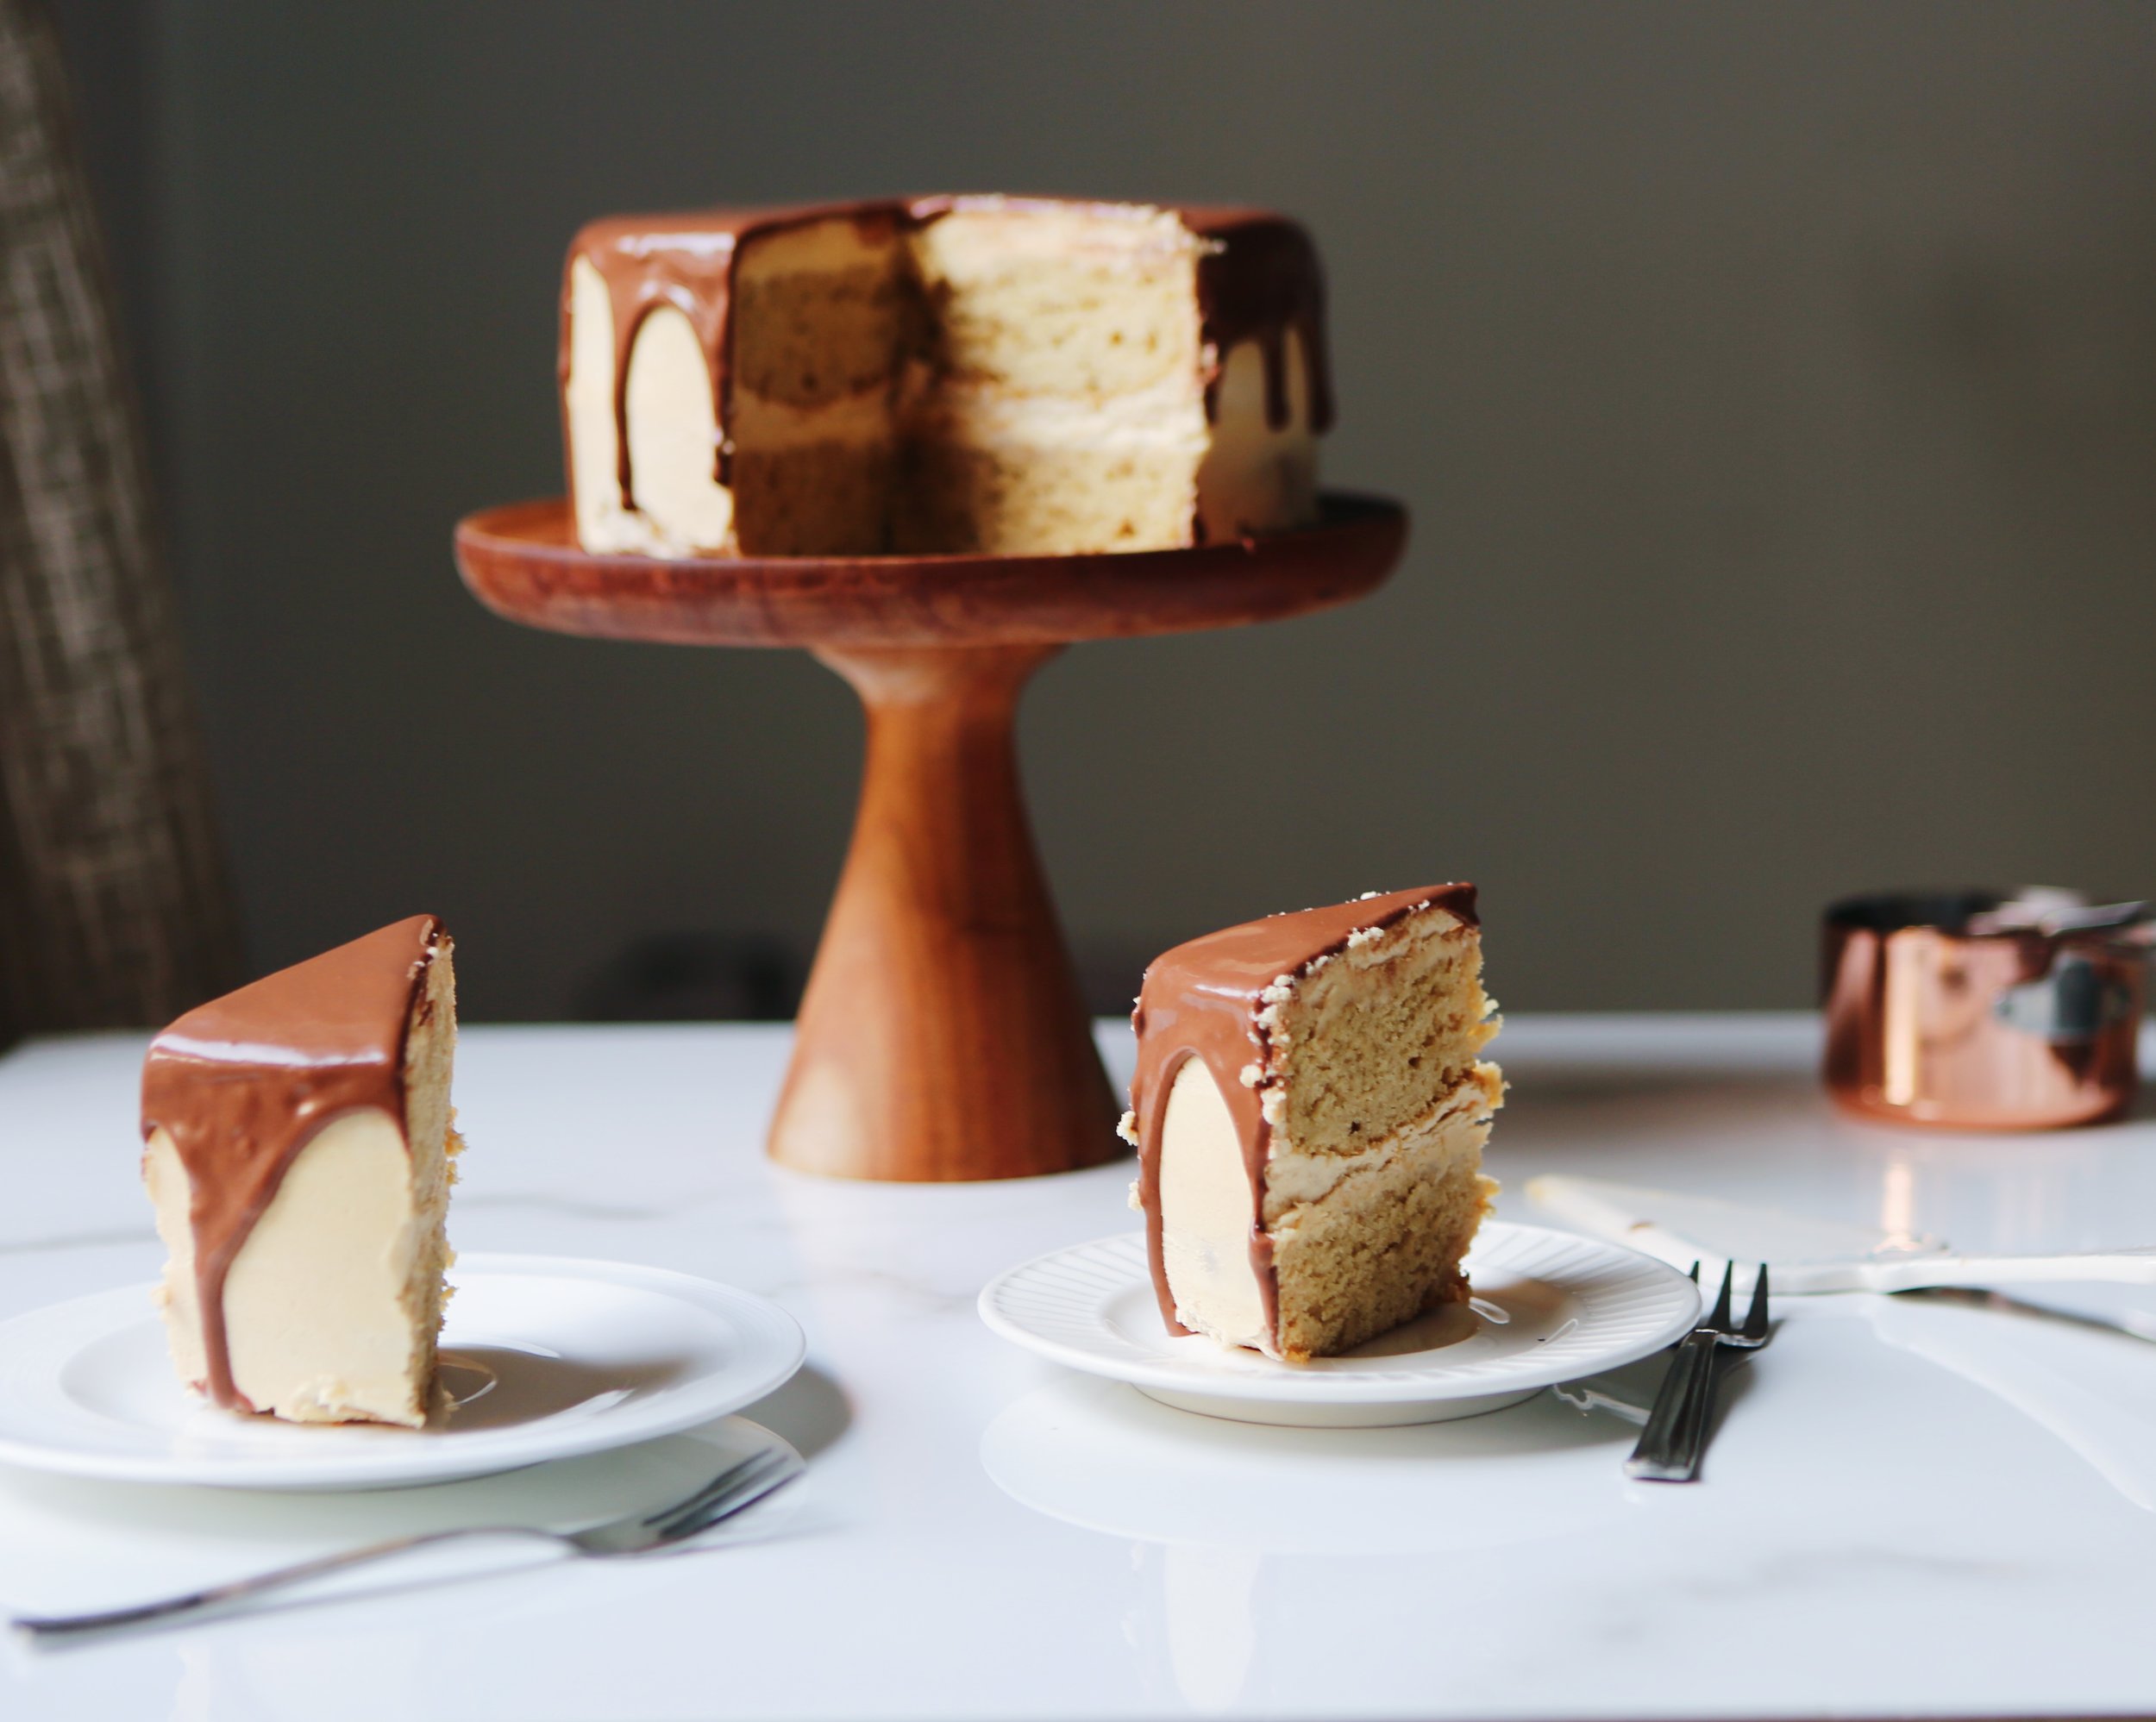
This butterscotch cake with chocolate glaze evolved from a haphazard day in the kitchen and multiple recipe books open on the counter, youtube videos playing the background. The recipe looks complex, according to my mum, but after i convinced (read: forced) her to try it, she agreed that it is actually a bunch of simple things put together. It is time consuming though!

—

In other news, my life in the kitchen feels like a microcosm (microcosm? microcosm!) for my life as an adult overall - a little haphazard and uncertain but also so fun and so rewarding. Besides the fact that i’ve gotten locked out of my apartment 4 times this past month and the smoke alarm sometimes goes off when i burn my toast - im not a morning person), I’m really getting better at being an adult. Adulting is wildly unglamorous. But its kinda nice too. It is… drinking out of real wine glasses instead of solo cups. But also, separating your laundry. :)

More later

RECIPE

For the cakes
160 g brown sugar
210 g flour + 1 tsp baking powder + 1 tsp baking soda + pinch of salt
3 eggs
1 tsp vaniilla
1/3 cup cream
200 g unsalted butter 

Frosting:  

Butterscotch sauce: 
1 cup sugar
1/2 cup cold water
1 cup ceam 

Buttercream: 

4 egg yolks

130 g sugar
1/3 cup water
300 g unsalted butter

Chocolate glaze
60 g dark chocolate
1/4 cup cream
2 tbsp corn syrup
2 tsp scotch whiskey 


Prep: 
Pre-heat your oven to 180 ˚ C. 
Line 2 7-inch baking pans with parchment paper
Use a pastry brush to butter the pans and dust with flour. 
Measure out all the above ingredients and set aside. 
Ensure that the butter is softened and eggs are room temperature. 

Baking: 
Mix the flour, salt, baking powder and baking soda in a bowl and set aside. 
To make the cakes, first cream the brown sugar and butter in the bowl of a stand mixer, for about 3 -4 minutes, till it’s fluffy and lighter in colour. 
Add vanilla. Add all 3 eggs, one at a time. Scrape down the sides of the bowl and beat again. 
With the mixer operating at very low speed, add the flour gradually. Let it mix in a little between each addition. 
Lastly, add the cream and beat again. 
The cake batter should now be a balanced consistency, not too liquid and not too thick. 
Divide the batter equally between the two pans and bake at the centre of the oven for about 25 minutes. 
Check for doneness : Dip a toothpick into the cake, it should come out clean. Or lightly touch the centre of the cake - it should be soft and should spring back. 
When done, take it out of the oven and let it cool on the rack for about 30 - 60 minutes. 
Once cakes are completely cool, remove from the pans gently, wrap in cling film and refrigerate. 

To make the frosting: 
First make the butterscotch sauce - in a medium saucepan over medium heat, combine water and sugar and heat. Do not stir. 
The sugar will melt and slowly begin to caramelise and turn golden. 
Swirl the pan around at frequent intervals and ensure that its cooks evenly
Be patient. This will take about 10 - 15 minutes in all. This part also requires careful attention, so don’t go off and do other things. 
Let the sugar syrup turn a deep amber colour. 
Immediately remove from the pan and very carefully add the cream. The mix will bubble up vigorously. 
Use a whisk to mix it in and add a pinch of salt. 
stir thoroughly for about 4 - 5minutes until a thick glossy butterscotch sauce is formed. 
Set aside to cool

For the buttercream - beat the egg yolks  in the bowl of your stand mixture thoroughly until pale in colour. 
again, heat sugar and water in a medium saucepan and stir until the sugar dissolves completely.Beat
Let it cook, stirring frequently, using a wooden spoon. 
Use a candy thermometer to test the temperature. 
When it reaches about 250 ˚, gradually and very carefully pour the sugar syrup into the bowl of the stand mixture. Keep the mixer of low speed and pour the syrup in a steady strream down the side of the bowl. When all the sugar syrup is poured in, increase mixer speed to high and let it whip. 
With the mixer still on, add all the butter, one cube at a time. Let the mixture whisk for about 5 - 7 minutes. You should now have light and fluffy buttercream. 
With the mixer on medium speed, add in the cooled butterscotch till the butterscotch buttercream is ready 

For the chocolate glaze  
Gently heat the cream and corn syrup on medium heat until it comes to a simmer
Pour it over the chocolate and whisk. The chocolate will melt from the heat of the cream. Whisk until smooth
add scotch and stir. 
Rrefrigerate for about 10 - 15 minutes. 

Assembling the cake: 

Place one cake on a board and spread a generous layer of buttercream all over the top. 
Gently place the 2nd layer of the cake on top. Cover the top and sides of the cake with a thin layer of buttercream.
Refrigerate the cake for about 20 - 30 minutes. 
Take the cake out of the fridge and spread another thick layer of buttercream frosting over the top and sides. 
Use a small offset spatula to even out the frosting and create a smooth finish.  
Refrigerate the cake again for about 20 minutes. A chilled cake will help the glaze to drip smoothly down the sides. 
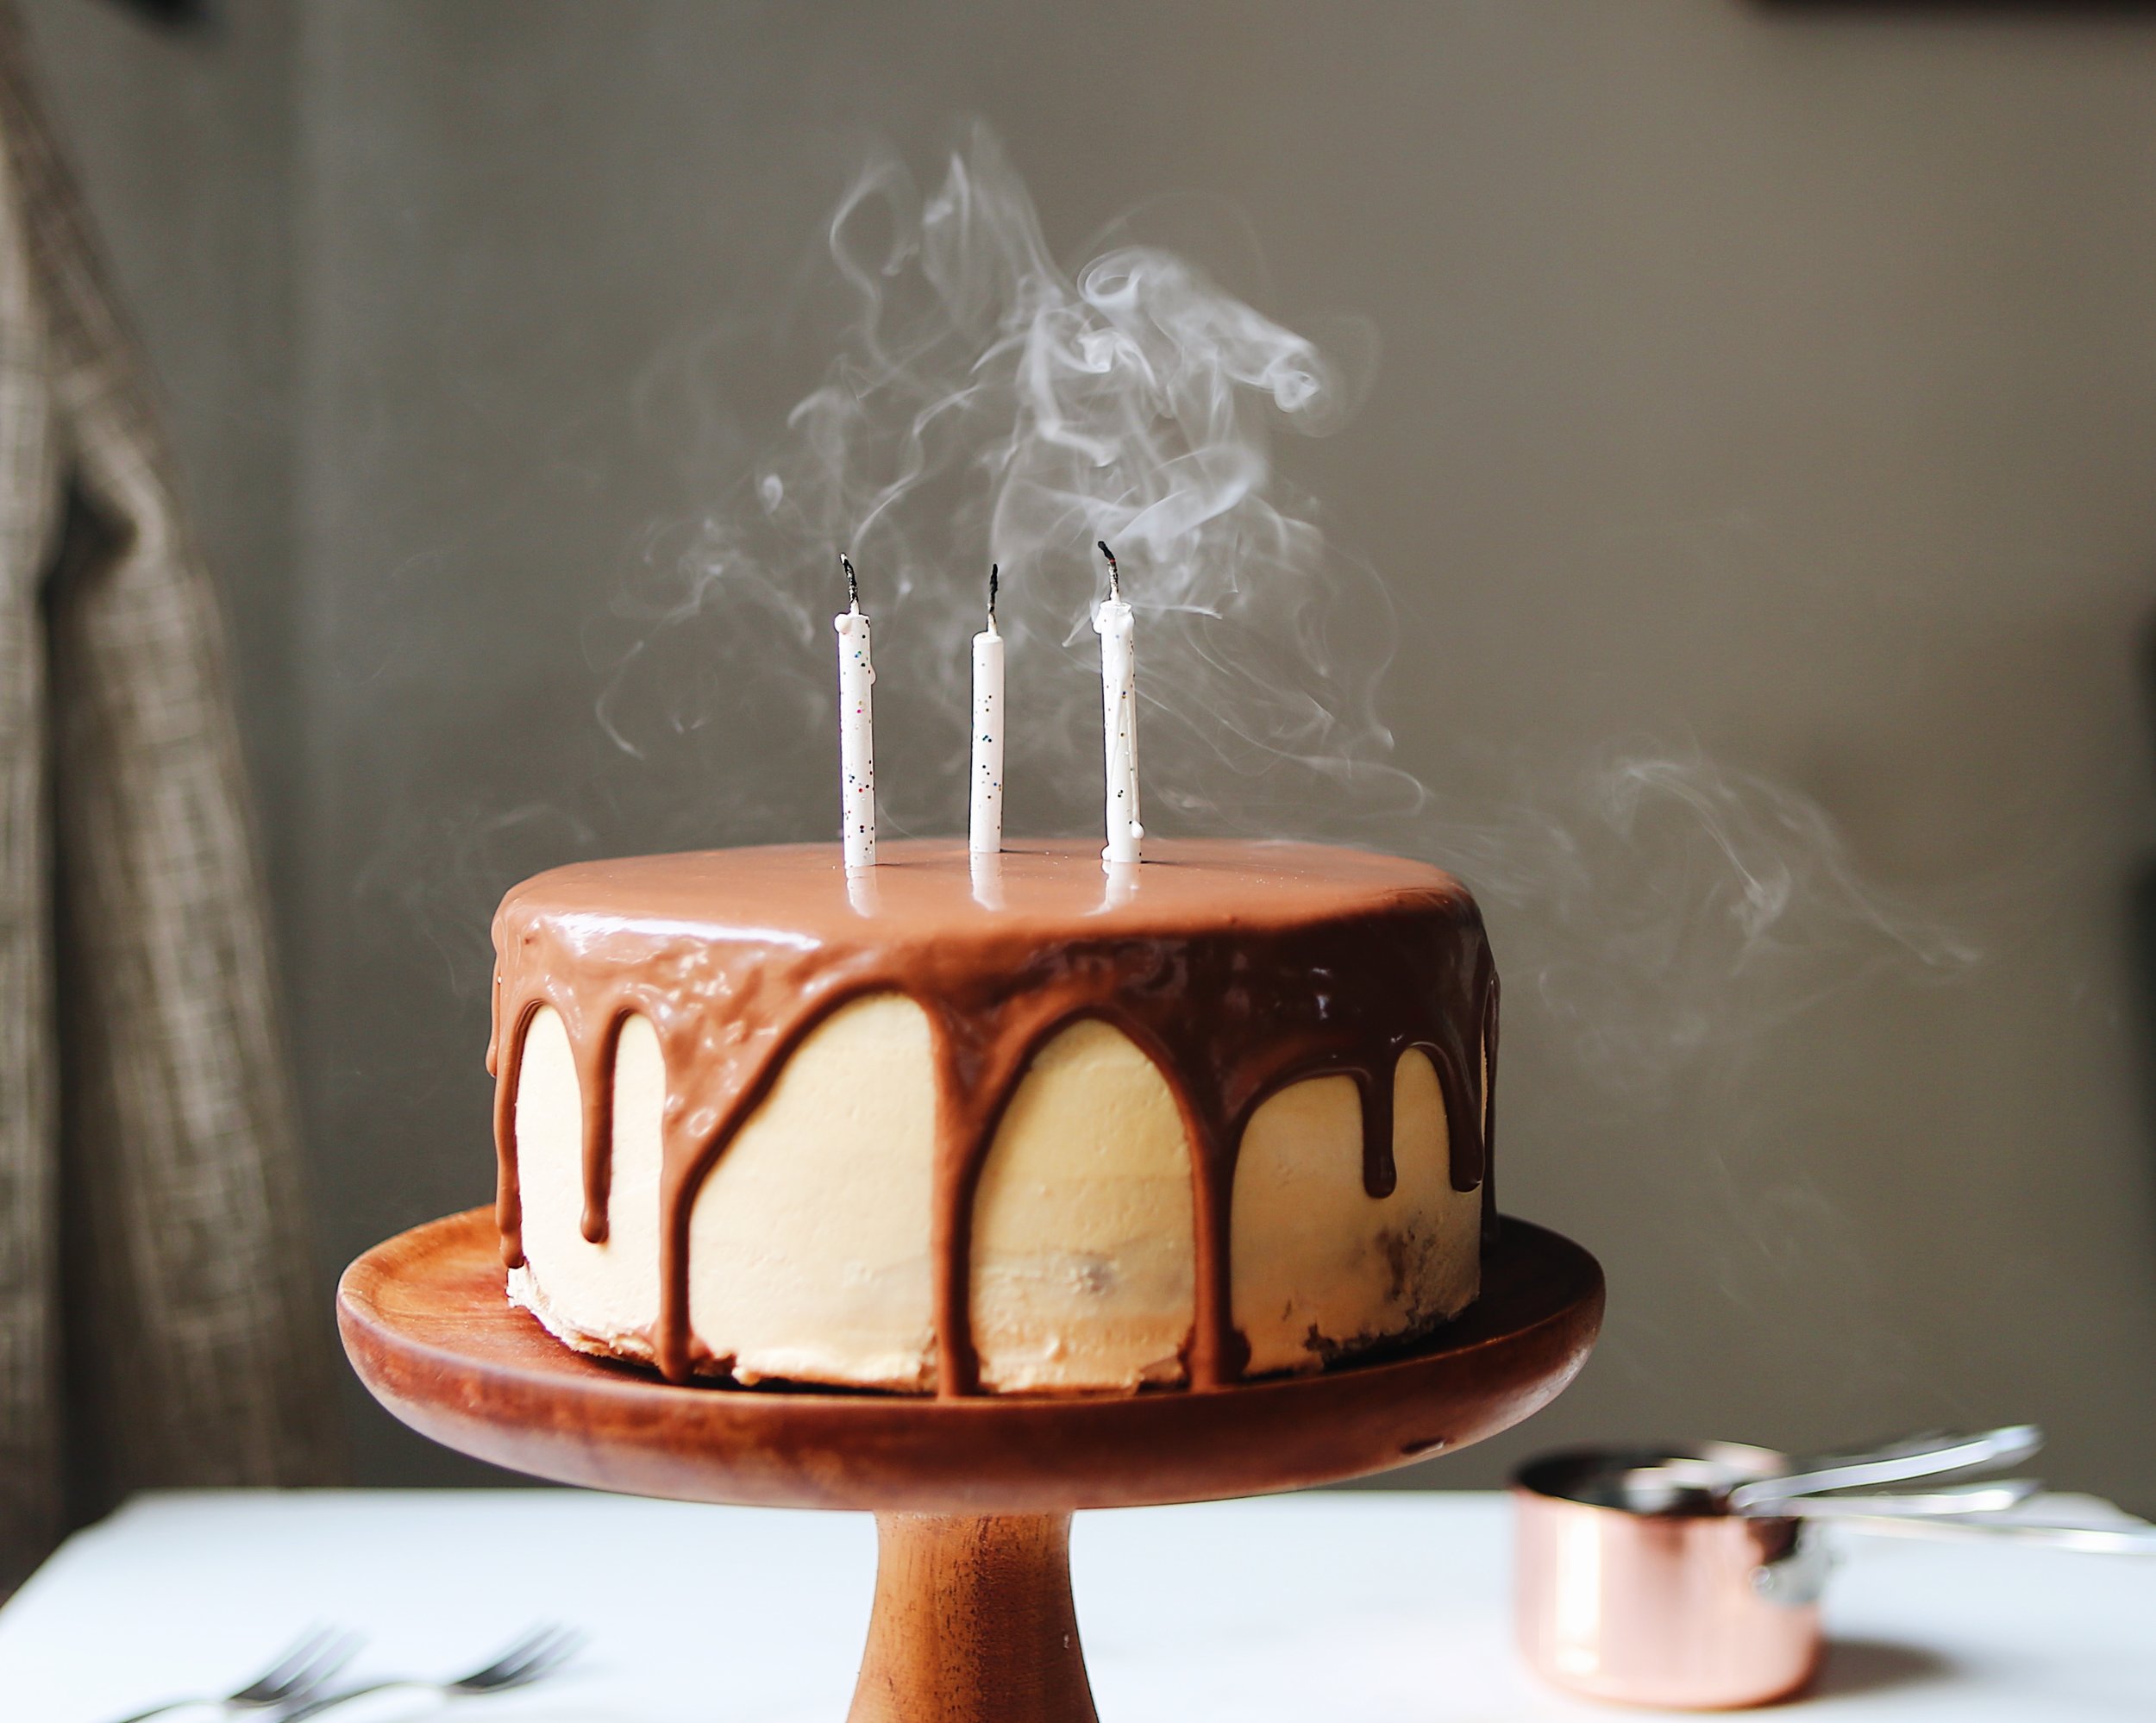
Use a spoon to slowly drip the chocolate glaze on the edges of the cake, letting it drip down the sides. 
In the end, spoon the glaze over the centre of the cake and use an offset spatula to gently spread it smoothly across the top.  
Decorate the top with sprinkles or leave it plain, like i did! 

And it’s ready to serve !

In Recipes Tags recipe blog, food lover, cake recipes, butterscotch cake, delicious, delicious cakes, cake recipes chocolate, cake photos, Cakes, recipe, yummy cakes
6 Comments

Pumpkin pie

November 2, 2017 Gayatri S
FullSizeRender.jpg.jpeg
IMG_8336.JPG

I’m in Chicago - it’s new, exciting, scary all at the same time! Chicago is big and exciting just like you’d expect it to be. Tall buildings, beautiful lake, the works. But Evanston - the suburb where I really live - is a tiny, cute little town where things close early and buildings are old and creaky (at least, my apartment building is). It’s literally one Luke’s Diner short of being exactly like Stars Hollow (Gilmore Girls binge watchers will know). 

IMG_9674.JPG


Last week I went to a baking class. I feel like I need to share this pumpkin pie recipe with you all because it is amazing. Disclaimer: I’m a shameless, proud, pumpkin lover - in this old post, I might have mentioned that I would use pumpkin spice candles, bath salts, whatever you give me. But even if you are one of those pumpkin loathing people who think the internet has blown the pumpkin fad out of proportion and cringe at pumpkin shower cream variety of consumers like me, you will still love this recipe. Enough said. 


PIE CRUST:

1 1/3 cups all purpose flour

½ teaspoon salt

½ cup all vegetable shortening

3 to 6 tablespoons ice cold water

Blend flour and salt in a large bowl. Cut shortening into flour mixture using pastry blender or fork. Stir in just enough water with fork until dough holds together.

Test dough for proper moistness by squeezing a marble-sized ball of dough in your hand. If it holds together firmly, do not add additional water. If the dough crumbles, add more water by the tablespoonful, until dough is moist enough to form a smooth ball when pressed together.

Shape dough into a ball for single pie crust. Chill in freezer for 15 minutes or refrigerator for 30 minutes. Roll dough from center outward into a circle about 2-inches wider than pie plate on lightly floured surface. Transfer dough to pie plate. Trim edges of dough leaving a 3/4 inch overhang. Fold edge under. Flute dough as desired.

FILLING:

One 15 ounce can of pumpkin

One 14 ounce can of sweetened condensed milk

2 large eggs

1 teaspoon of cinnamon

1/2 teaspoon of ground ginger

1/2 teaspoon ground nutmeg

1/2 teaspoon salt

One 9 inch unbaked pie crust

Preheat oven to 435 degrees F. Whisk pumpkin, sweetened condensed milk, eggs, spices and salt in medium bowl until smooth. Pour into crust. Bake 15 minutes.

Reduce oven temperature to 350 degrees F and continue baking 35 to 40 minutes or until knife inserted 1 inch from crust comes out clean. Cool. Garnish with whipped cream. Store leftovers covered in refrigerator. 

IMG_7642.JPG
In Recipes Tags pie, pumpkin, pumpkin pie, recipe, dessert, dessert blog, recipe blog, dessert photos, dessert recipe, delicious, tasty, delhi bloggers, blogger, food bloggers
Comment

Peppermint brownies

April 28, 2017 Gayatri
IMG_1183.jpg
IMG_1329.jpg
IMG_1327.jpg

Is there anything more universal than chocolate brownies? Is there a person in the world who doesn’t love the crackly, slightly crunchy crust, chewy edges and squidgy, chocolaty, almost molten centre? It’s a good thing. Brownies are supposed to be intense, rich and overpowering. There’s nothing subtle about them, and decadence is the trademark of a brownie. Not to mention, brownies come with a side of nostalgia - who hasn’t tried making brownies as a child and almost burnt down the house? (that would be me..).

So last weekend, in a spontaneous brownie baking moment (if you know, you know) I decided to add one of my favourite ingredients to my brownie batter - peppermint! I love peppermint and dark chocolate together - it is a refreshing variation to a popular classic. PLUS - the best part is, you can use leftover brownie crumbs/chunks to make peppermint brownie vanilla ice cream - summer bonus, and a very appropriate dessert for this weather.

They taste like the brownie equivalent of after-eight and they don’t look any different than regular brownies so it comes as a pleasant surprise to someone who bites into one. They’re a crowd pleaser and up your popularity quotient if you take them to work the next day (LOL)

IMG_1328.jpg
IMG_1182.jpg
IMG_1184.jpg

Ingredients:

  • 500 g chocolate

  • 250 g butter

  • 4 eggs

  • 1 1/2 cup sugar

  • 1 cup flour + 1 tsp baking powder + 1/2 tsp salt

  • 1 tsp vanilla extract

  • 3 tsp peppermint extract

  • Crushed peppermint (optional)

Process

  • In a saucepan over medium heat, melt the butter and chocolate together until smoothly combined. Let cool.

  • cream the eggs, sugar and vanilla in a bowl.

  • Add the cooled chocolate and butter mixture and add peppermint extract & combine well.

  • Add the flour mix one spoon at a time and mix well, but do not overmix.

  • Pour the batter into the pan and bake for about 30 - 35 minutes or until the top forms a flaky/crusty layer. The centre should not be wobbly.

  • When done, take it out of the oven and let the brownies cool for about a half hour.

  • Slice into squares, sprinkle with crushed peppermint and eat!

In Recipes Tags brownies, brownie recipe, chocolate recipes, chocolate brownies recipe, yummy recipes, dessert recipes, peppermint recipe, dessert blog, food blog in chicago, foodies, food bloggers, Food, food blogs in delhi, food lover, fruit, Dessert, delicious, delicious chocolate recipes, sweet, summer desserts, style, sweet dish, summer recipes
3 Comments
Older Posts →
Hello - welcome to the dessert project, where I bake, eat, photograph, experiment and basically play around with all things sweet! Thanks for stopping by and shoot me a message if you'd like to chat! x

Hello - welcome to the dessert project, where I bake, eat, photograph, experiment and basically play around with all things sweet! Thanks for stopping by and shoot me a message if you'd like to chat! x

INSTAGRAM

👀
Cupcake dreams 💭
Hardest goodbye
Brownie tower
Why choose between brownies and cheesecake when you can have both. Yolo
Made cheesecake brownies with my leftover ingredients ! Thank you for all the suggestions you guys sent 🙏🏽🙏🏽

Powered by Squarespace