• Home
  • Recipes
  • About
  • Contact
  • PRESS
Menu

The dessert project

Street Address
City, State, Zip
Phone Number
Playing with sugar

Your Custom Text Here

The dessert project

  • Home
  • Recipes
  • About
  • Contact
  • PRESS

Milk chocolate chip and gems cookies

June 9, 2016 Gayatri
FullSizeRender-12.jpg
FullSizeRender 13
FullSizeRender 13

For most desserts, there’s a way to eat it. Let’s say a cheesecake or a pudding, typically eaten after a meal. You’d slice a piece, put it on a plate, pick up a fork and eat, neatly polishing it off until the entire slice is gone and you’ve drifted into dessert heaven. Now you’re done and it’s likely that you’ll put back your plate, and get on with your day.

But cookies are different. Cookies don’t demand the sophistication of putting them on a plate or the civility of cleaning up after.  Eat them directly from the jar or box, nibble at them while you watch a movie, scarf them down while you work on a stressful project, or read a thrilling book. Cookies are fuss-free, anytime snackage food which makes them one of the most comforting foods ever because it is completely acceptable to eat them anytime your sweet tooth demands..

.

I ate my friend Neimat’s most delicious milk chocolate chip and gems cookies at 3am on a random friday night and i am not exaggerating when i say that they were the best chocolate chip cookies I have ever had. Maybe it was the 3am sugar itch or maybe just the fact that chocolate chip cookies are always a good idea anyway, but they were seriously ridiculously good. I might add that Neimat is a trained chef but her chocolate chip cookies reek of that delicious, homely comforting flavour that chocolate chip cookies are meant to have.

.

I know most recipes ask for bittersweet chocolate and I’m a huge fan of 70 per cent but in defence of milk chocolate, nothing can replicate childlike flavours like the combination of unapologetically sweet milk chocolate chips in a salty-sweet cookie dough. PLUS GEMS! 90s kids will know. These cookies are soft with chewy edges, bursting with gooey milk chocolate and the crunch of gems. Basically quite a perfect bunch of textures.

.

IMG_1951
IMG_1951
IMG_1964
IMG_1964
FullSizeRender 11
FullSizeRender 11

.

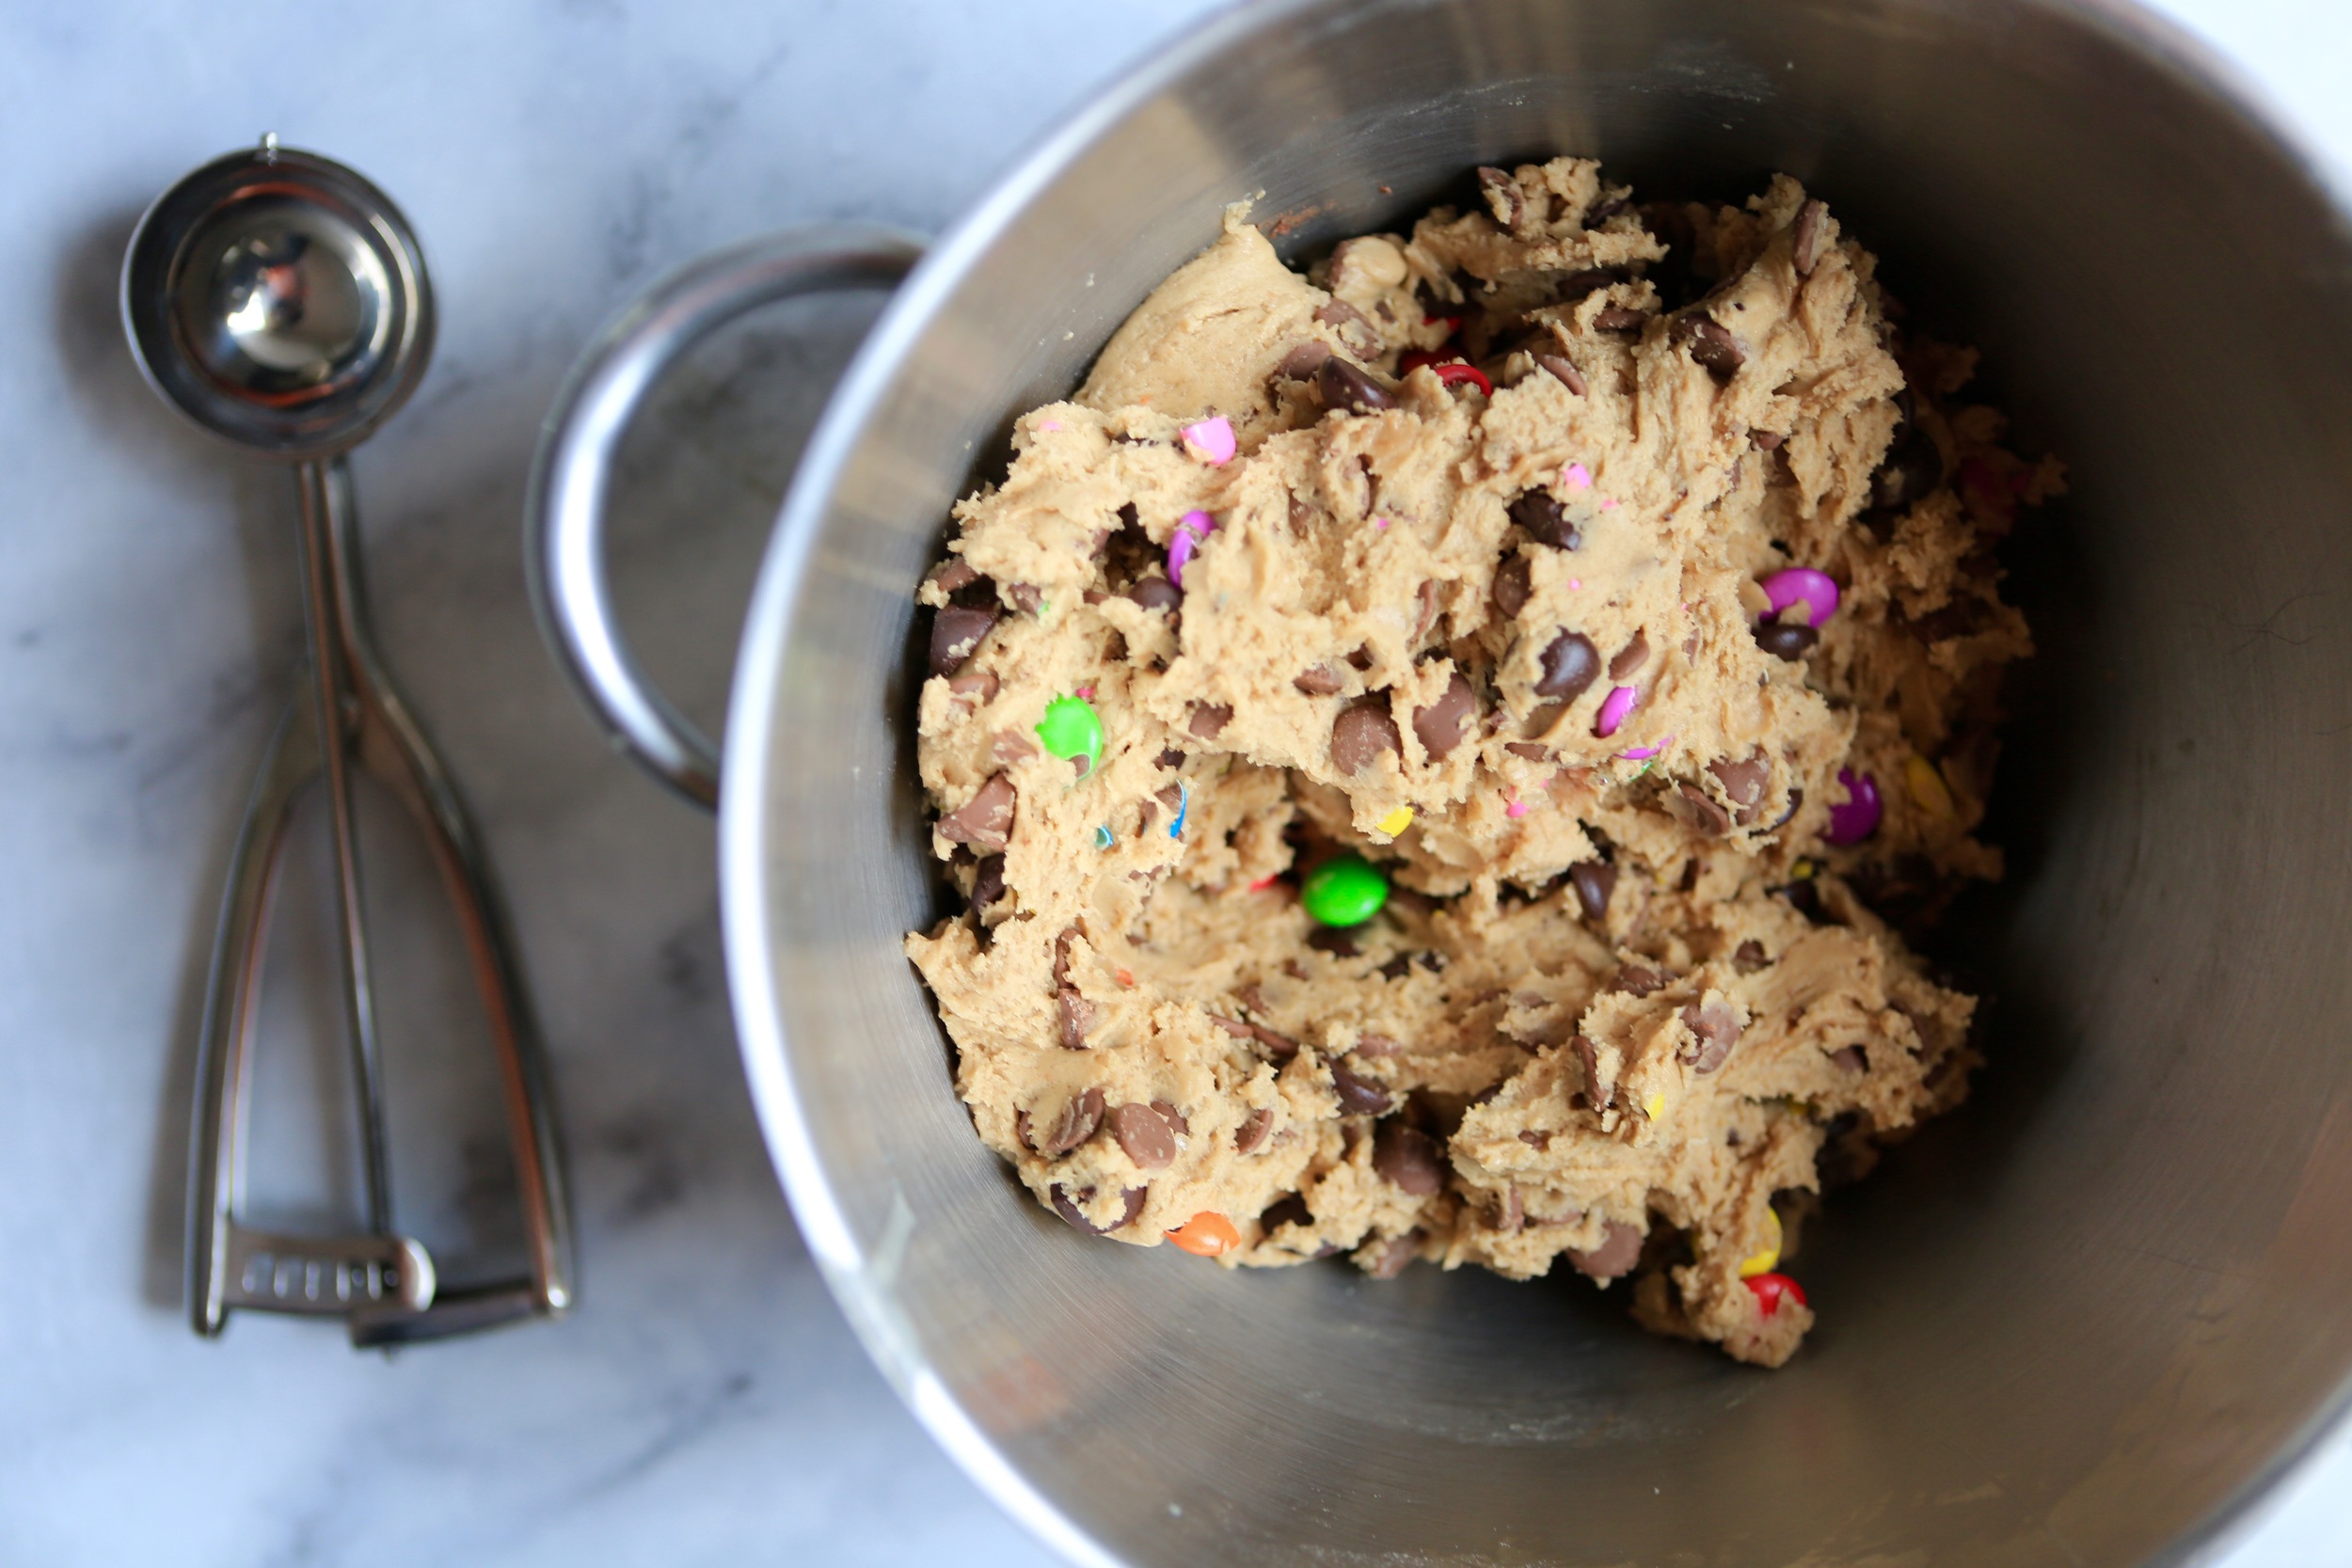
This recipe is an easy drop and bake recipe and doesn’t require rolling out cookie dough. I suggest using a cookie scoop or small ice cream scoop to get even sized cookies. Also, seriously seriously invest in good quality milk chocolate chips. I use

Ghirardelli (the blue bag)

but if you don’t find those, 

Choko La

also makes really nice ones! Here is the recipe:

.

2 1/2 cups flour 

1 cup brown sugar 

1/2 cup powdered sugar 

2 eggs 

200 g butter (soft, not melted)

1 tsp vanilla 

1 tsp baking soda 

1 tsp sea salt 

2 cups milk chocolate chips 

1 cup gems 

.

Preheat your oven to 180 ˚ C and line a baking tray with an un-greased cookie sheet/ silpat or butter paper. 

In a bowl, mix the flour and baking soda and sea salt

Beat the butter and both sugars in a large bowl 

One at a time, add the eggs and then the vanilla 

Now add the flour mixture one spoonful at a time and mix until a cookie batter is formed 

When done, add the 2 cups of milk chocolate chips and the gems and mix it into the batter with a spatula 

Use a cookie scoop to spoon out round cookie batter onto the cookie sheet. 

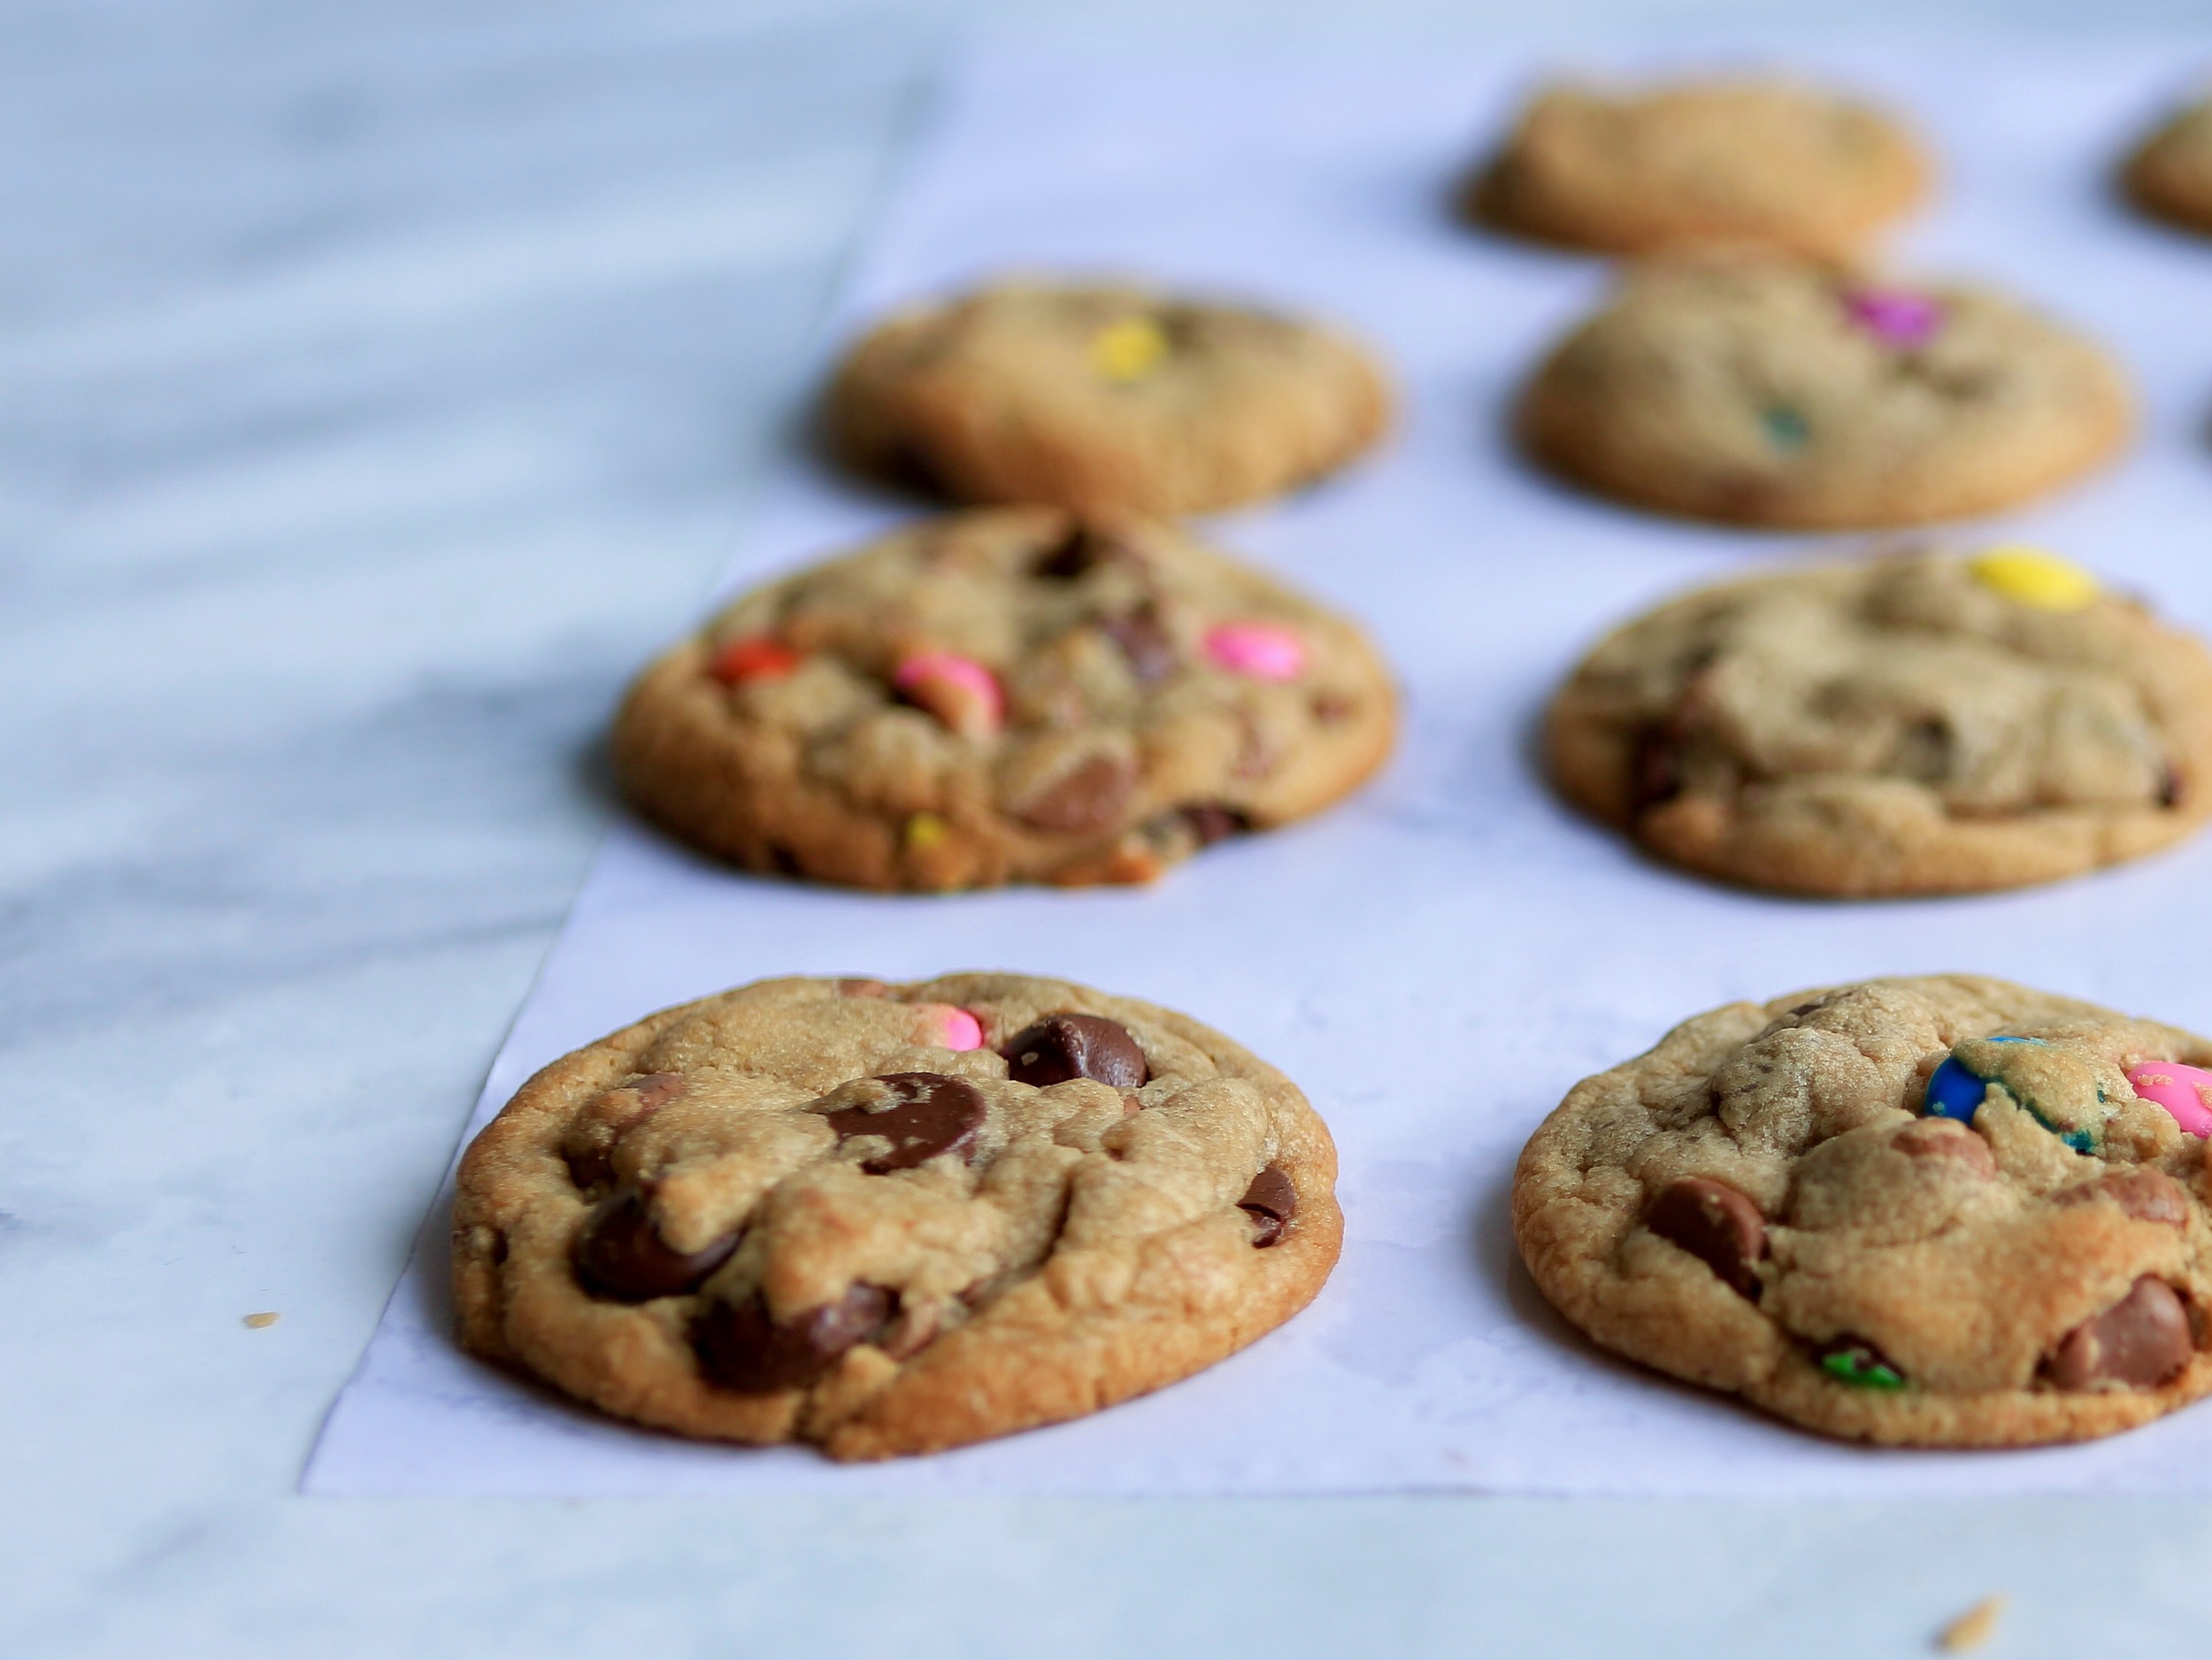
Bake for about 8 - 10 minutes.

Let them cool and then eat! 

.

Notes: 

The batter should be 

sticky

 - not runny, but not doughy either. If it is too liquid/runny, add more flour.

The cookies will be very soft when done and that's fine. They are meant to be soft and will harden a little as they cool.

Make sure the butter is soft/ room temperature, but not melted. Melted butter could cause the cookies to spread too much in the oven.

In Recipes Tags baker, baking, blog, childhood, chocolate chip cookie recipe, chocolate chip cookies, cookie recipe, cookies, cooking, delhi, delhi bloggers, delicious, Dessert, flavour, Food, food blog, food bloggers in india, food blogs in delhi, india, milk chocolate, recipe, recipe bloggers in india, sweet, taste, tasty, yummy
4 Comments

red velvet cake

December 19, 2015 Gayatri
afinal.IMG_3620.jpg

Hi guys ! Hows everyone’s weekend going ? If you’re having a typical Saturday, battling a hangover like I am, I feel you.

What is your hangover dealing routine ? Is it a shower, a workout, a giant cup of coffee ?

My standard go-to hangover routine is French fries and coffee, arguably a strange combination but somehow it does the trick. Anyway, today I swapped the French fry ritual with a giant slice of red velvet cake, and it was like comfort on a plate. If comfort was red and slathered with cream cheese.

I’ve been making red velvet cake for a while now, way before I started really baking and thought there was something cool about it. But the truth about red velvet is that its just a light cocoa sponge with red food colouring. But but but, sandwich some cream cheese frosting between the layers and you have yourself a pretty delicious cake!

afinal.IMG_3662
afinal.IMG_3662
IMG_2031
IMG_2031

Also, I recommend a layer of frosting for every half inch layer of cake. In this particular cake, frosting is everything, and for it to be the really delicious creamy, soft spongy cake that you imagine it to be, the frosting to cake ratio needs to be perfect. So I make 2 layers in 2 separate cake pans and then slice each layer into half, making it a 4 layer cake. So that increases the surface area for the frosting so it can be really generously put into the cake.

Okay im done being scientific/mathematical about things, I had a moment of nerdiness and its over now.

IMG_2028
IMG_2028

Here’s how to make a kickass red velvet cake (adapted from Joy of Baking, Ritu Dalmia's cookbook and the Epicurious - experts on experts on experts)

CAKE:

250 grams sifted flour + baking powder + baking soda

1/2 teaspoon salt

20 grams cocoa powder

115 gm unsalted butter softened

300 gm granulated white sugar

2 large eggs

1 teaspoon pure vanilla extract

240 ml buttermilk

3 tablespoons liquid red food coloring*

1 teaspoon white vinegar

1 teaspoon baking soda

FROSTING:

1 ½ Pkt Philadelphia cream cheese

60gm butter

120 gm icing sugar

1 tsp vanilla extract

Preheat oven to 180˚ C. Butter two 8 inch round cake pans and line the with parchment paper (Very important!) . Set aside.

In a bowl sift the flour, salt, and cocoa powder, baking powder and baking soda. Set aside.

In another bowl, beat the butter and sugar until light and fluffy (about 3 minutes), using an electric mixer. The mix should now look pale yellow, almost white.

Add the eggs, one at a time and beat. Add the vanilla extract and beat until combined. Scrape down the sides with a spatula.

In a cup, whisk the buttermilk with the red food coloring

*(amount of food colouring varies a little, depending on the brand you use. You want to add enough so that the buttermilk mixture is a strong red.)

Alternately add the flour mixture and buttermilk to the mixture, folding continuously. (basically add the flour mix, then buttermilk, then flour mix again, then all the rest of the buttermilk, then flour mix again until all of it is combined)

In a small cup combine the vinegar and baking soda. It will fizz a little. Add to the cake mixture and immediately fold.

Divide the batter evenly between the two cake tins. Bake for approximately 30 minutes or until a cake tester inserted into the center comes out clean. Let the cakes cool at room temperature and then wrap in cling plastic and refrigerate the layers for about 30 minutes.

Meanwhile, get on the frosting.

Cut the Philadelphia Cream Cheese and butter into cubes and whisk using an electric mixer. Add the icing sugar spoon by spoon, whisking throughout.

To assemble:

Slice each cake layer in half, down the middle, using a serrated knife, so you now have 4 equal layers.

Generously frost the first layer with the cream cheese frosting and neatly place the next layer on top. Repeat.

When all layers are frosted, frost the top and sides with a thin layer of icing. Then refrigerate the cake for about 15 minutes.

Lastly, take out the cake from the fridge, and use all the leftover frosting to frost the rest of the cake.Dust with red cake crumbs.

EAT !

In Recipes Tags blog, cake, colour, cute, delhi, delicious, Food, food lover, food photography, food styling, foodie, foodies, india, love, photography, red, red velvet cake, yummy
1 Comment
← Newer Posts
Hello - welcome to the dessert project, where I bake, eat, photograph, experiment and basically play around with all things sweet! Thanks for stopping by and shoot me a message if you'd like to chat! x

Hello - welcome to the dessert project, where I bake, eat, photograph, experiment and basically play around with all things sweet! Thanks for stopping by and shoot me a message if you'd like to chat! x

INSTAGRAM

👀
Cupcake dreams 💭
Hardest goodbye
Brownie tower
Why choose between brownies and cheesecake when you can have both. Yolo
Made cheesecake brownies with my leftover ingredients ! Thank you for all the suggestions you guys sent 🙏🏽🙏🏽

Powered by Squarespace